*This game was fought with the old scenario rules. Two brigades should have appeared behind the American forts not crossed at the mouth.
Today our wargaming group played the Battle of Plattsburgh. Overall, it is is one of my favourite scenarios so far. We decided it ended in a draw, though the British were winning, the main defensive positions were intact and the British fleet fleet would have arrived by the time the battle was called (no help from shore for the poorly led British fleet).
There were three players on each side. Each British player had a brigade and some guns, each American player had a fort and a small brigade at a ford or bridge. We rolled for sides, I rolled up the American side for this one, and took the middle fort and the brigade at the main bridge.

My newly created American earthworks for this scenario. The 7th New York Dragoons are visible at left.

The 1st British brigade approaches the ford, the 3rd British Brigade approaches the main bridge. The Americans start set up, ready to try to stop the British from crossing.

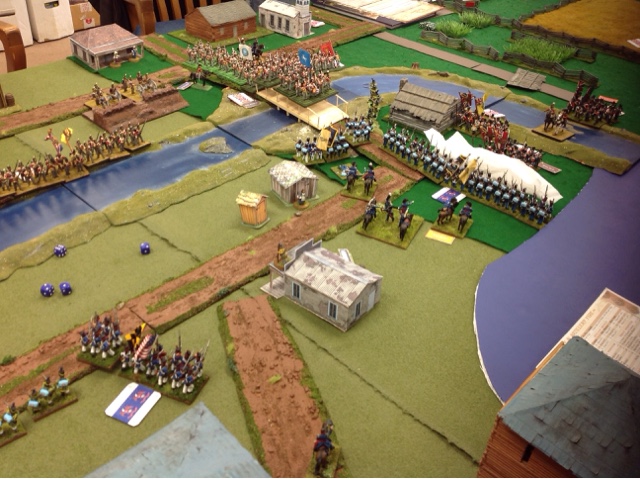
The 2nd British brigade approaches the other / upper bridge.

My position at the main bridge. I also have 6 volunteer rifles in the small building at right. The boards are still removed from the bridge at this point.

The American militia visible at the top hold off the British and actually routed and dispersed the British converged light battalion. They also cause heavy casualties on the line unit at the ford.

My cannon and line infantry trade volleys and shots with the British line and artillery. To the left, the militia guarding the ford engages in a long fire fight with the British regulars. They take heavy casualties and disperse.

The Canadian Voltigeurs and Canadian Chasseurs (formerly 5th Select Embodied Militia) plus the 19th Light Dragoons arrive in the forest. *As part of the scenario they could cross at a ford further down river.

My cannon continues to fire cannister into the British line. The British in turn shoot my cannon crew until it routs.

The British at the ford keep manouvering, but don't cross yet. We are 6 or 7 turns it at this point.

Finally a unit crosses as fresh militia approaches.

The militia at the bridge break and run from the French Canadians. The British brigade across the bridge starts crossing unopposed.

My gun breaks and disperses. The British that have just crossed the ford faill to charge the fresh militia.

The New York Dragoons position to drive off the Canadians and cavalry.
My shot up line unit stops a charge by British coming across the bridge, while the militia continue to stop the British attempting to charge them at the ford. My second unit, NY militia, which I've moved behind the main line because of casualties is visible at left. My volunteer rifles come out of the stone mill to attempt to help stop the British crossing the bridge.


The New York Dragoons charge the British 19th Light Dragoons, and though militia, and outnumbered 2 to 1 somehow win! Huzzah! The British cavalry retreat in disorder.

Though my small American brigade held well, my line regiment suffers over 50% casualties from shooting, they disperse leaving the the volunteer rifles and last unit of militia (from another player's brigade) facing two British brigades. This is where our scenario ended. The line unit was sure to be dead in the next turn or two. The Americans passed their "25% of the army lost" check but were about to lose another small brigade.
The British were very bloodied though, most units lost 10 or 20% and several were over 35%. The American blockhouses and forts remained in American hands. The British were too late to help the British fleet. So as in history, a sensible commander may have called off the attack.
Still, this is one I would like to revisit, especially after I properly paint my Canadian Chasseurs.

Hi Chuck,
ReplyDeleteAn excellent report and photos, it made it most enjoyable to follow.
I expect that if the game continued the British/Canadians would have eventually triumphed and so they should. Do you agree?
I did not realize there was ford at mouth of the Saranac where it flows into the bay as depicted on your terrain. A most unlikely place for a ford with all river rushing into the bay. A set of rapids maybe bu a ford? What is your source for this?
For your redoubts/forts, what target modifier was used?
Many thanks for a superb report.
Cheers
Hi Rod, on closer look you are correct. They had attempted to cross where I had the ford in game but the current was strong and they were under fire.
DeleteApparently there were "several" fords on the river, the British veterans were frustrated at the lack of information about them.
In reality 2 brigades and the light Dragoons crossed 3 miles away at Pike's Ford. They were in sight of the rear of the forts when the fleet was defeated.
Hi Rod, it is a strange place, though from the looks of the river it looks to have multiple fords. I will put an excerpt from one of the books in a fresh blog post for you, as well as a detailed close up from the Battle mural.
ReplyDeleteThe British were winning but had taken a long time reaching the forts. Partly my fault, next time the third brigade will be on assault and start